 This MFA page covers how to setup and use the App on Android. Learn how to install and use the application following the steps below.
Prepare your Account for MFA in Microsoft 365
MFA Setup
Android MFA Set-up using the Microsoft link
To get started, visit this link on your desktop and follow the steps below. This link will open a new tab in your browser.
https://aka.ms/MFASetup
Note:
When you arrive into Microsoft 365 from the link above, some users may already have security settings already configured and not be prompted for More information, but rather see a screen resembling Figure 1 below.
If so, select Notify me through the app in the dropdown menu. Verify the Authentication phone number is accurate for your MFA device.
Then [checkbox] Authenticator app or Token and click the blue [ Set up authenticator app ] button to proceed to Step2.

Click [ Next ]

Figure 1
Additional security verification
settings already configured.
Step 1
Choose ” Mobile app ” from under How we should contact you?
and select ” Receive notifications for verification ”
Then click ” Set up ”

You should now see this ” Configure mobile app ” window on your computer screen.

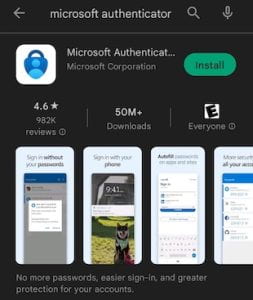
go to the Google Play Store
Search for and install the
” Microsoft Authenticator app “
Confirm you are installing
” Microsoft Authenticator app ” then proceed:• Open the Authenticator app
(on your phone)• Once installed, open the app and you will be brought to the privacy agreement Touch ” I agree “
![Tap [ I agree ]](https://sites.widener.edu/service-catalog/files/2021/03/android_08.png "Tap [ I agree ]")
![Next Touch [ Scan a QR code ]](https://sites.widener.edu/service-catalog/files/2021/03/android_08.jpg "Next Touch [ Scan a QR code ]") Some users have also reported that phones with lock-screen security enabled may encounter a prompt to enter your phone pattern, PIN, password or use your fingerprint in order to permit local device authorization before configuring the Authenticator app itself.
Some users have also reported that phones with lock-screen security enabled may encounter a prompt to enter your phone pattern, PIN, password or use your fingerprint in order to permit local device authorization before configuring the Authenticator app itself.Step 4
Open the Authenticator app
(on your phone)
Select the vertical ellipsis in the top right corner.
Select ” Add Account + ”

Select ” Work or school account ”

A window will pop-up; Choose
“ Scan a QR code “ Note :
Your phone will prompt you to allow authenticator app to use your camera.
Select Allow

Point the camera at the [ QR code ]
on your computer screen
(as shown in Step 2 above).The app should auto detect and enroll your account. Note :
You may see a pop-up
” Unable to add the account “Slide/Enable Show notifications in Phone App Preferences.

You may have to set this in Phone App Settings

Your phone screen should now show” Activating Please wait… “Shortly after you should see your
new Profile in the app as shown >

show what is picturedClick ” Next “
![Click [ Next ]](https://sites.widener.edu/service-catalog/files/2021/03/android_15.png "Click [ Next ]")
Click [ Next ]
Go to your phone and ‘Tap’ the pop-up
” APPROVE “

The computer screen will show the
Additional security verification window.

On your computer screenSelect country as ” United States (+1) “enter your cellphone numberthen click “ Done “
![complete this screen and click [ Done ]](https://sites.widener.edu/service-catalog/files/2021/03/android_17.png "complete this screen and click [ Done ]")
complete this screen and click [ Done ]
Completion
MFA setup is complete on your device. Click ” Cancel ” and close the browser tab.
The Save button is greyed out by design in Figure 4. Just click “Cancel“.
You have completed setup.
: : : : : : : : :
Need Help ?
Modifications to your MFA preferences
can be made at the following link :

: : : : : : : : : : : : : : : : : : : : : : : : : : : : : : : : : : : : : : : : : : : : : : : : : : : : : : : : : : : : : : : : : : : : : : : : : : : : : : : : : :
Test MFA with User Once EnforcedInstructions for HowTo Test MFA on the Widener Network before it is enforced can be found by widener users at the following links:
: : : : : : : : : : : : : : : : : : : : : : : : : : : : : : : : : : : : : : : : : : : : : : : : : : : : : : : : : : : : : : : : : : : : : : : : : : : : : : : : : :
60day Option
Once you have completed all steps above, on your next Microsoft 365 logon you will see this APPROVE Sign in Request on your computer screen. Anytime you are connected to the Widener network, you will NOT be prompted for MFA authentication.You have the option to check the box: “ Don’t ask again for 60 days ” It is recommended to check the box if it is your University asset or personal device.

Follow these instructions to use MFA
without the Microsoft Authenticator app.
Please visit the MFA FAQ’s for more information. If at any time you experience any issues with setting up or logging in using MFA, please submit a quickticket.widener.edu or call the CX Team at 610-499-1047 for further assistance.